Reclaimed wood wall art panels
Here’s my latest Pinterest-inspired project!
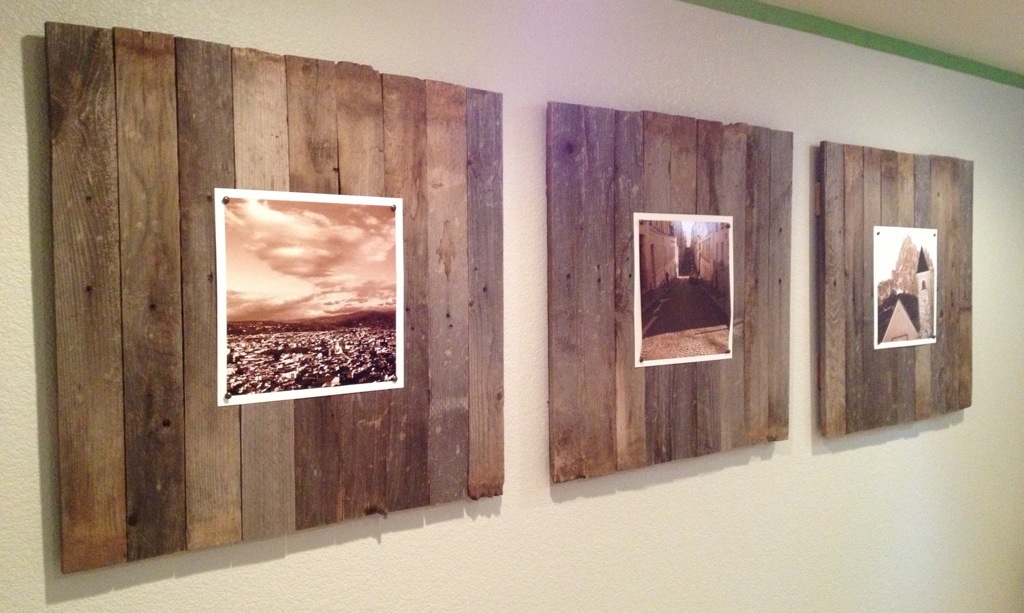
Matt had torn down (and then rebuilt) an old fence in our backyard and so we had a bunch of pickets I could use for this project. I had seen this pin on Pinterest, and thought it could be something that I could DIY. I wanted something fairly large to hang on some empty walls in our basement rec room, so I thought this would be worth a shot, and enlarged some photos from our honeymoon. It turned out to be a pretty easy project, and I did all three for less than $30 since I already had a lot of the materials on hand. Not bad, considering the original pin links to a similar item being sold for $110 each!
The pickets had already been cut to a similar length, thanks to our fence improvement project, so all I had to do was lay them out to form a square and them drill a couple pieces on the back to hold them all together. I varied the cut sides (some are at the top, and others at the bottom.


I screwed them together from the back, so you don’t see them from the front. They are around 30″ square.
Then I added hanging hardware on the back, as well as some adhesive cork (it’s drawer liner) to the bottom corners to save the wall from getting scratched and to provide a bit of grip to keep them steady and even once hung. You could easily use other types of picture/frame stabilizers- I was just using what I had around.


It was Matt’s idea to use upholstery tacks to hold the pictures in place – this way the art can be easily changed out.
I also put some poster board behind these photos to make them pop a bit more.
Here’s a budget breakdown of this project:
Wood – luckily free, we had it around
Screws – we already had these
Hanging hardware – $2
Cork for stabilizing – already had this, too
Poster board – $14! (Note to self, don’t send hubby to the craft store on an errand. He’s not a bargain hunter like me.)
Upholstery tacks – $2
Photo enlargements – $3 each at CostCo = $9
TOTAL: $27
I love the look of the weathered wood. I’m a bit surprised by this, because I typically like really modern-style home furnishings… so this look is something I haven’t done before. The art really fills up this wall, and I love that we can swap out the photos in the future, if we want. What do you think?


Is it spring yet?!
The trees are starting to bud, and we’re supposed to get snow tomorrow. Yep, it’s definitely spring in Denver!
With our basement out of commission (due to the flood, and lack of progress while we wait on insurance checks to be endorsed by our mortgage company…), our new (bigger) house is starting to feel small. I think Matt and I always start hating our house this time of year, because we’re itching to GET OUTSIDE!
So I’ve started daydreaming and planning for some outdoor improvements on our house. Our first project will be rototilling and putting down grass seed in the backyard. The backyard is currently a big patch of dirt. Now that Norah is so close to walking, I desperately want a backyard that she can safely play in. But our curb appeal right now is horrendous. We won’t have a lot of funds to work with for a while, so I’m dreaming up cheap improvements for the front yard. Here’s a photo of the house from before we bought it last fall. Since then we have replaced the garage door, and obviously the for-sale sign is no longer in the front yard. =)

Here’s my to-do list for this year:
- Either remove or paint the shutters. Matt wants to remove them, but I’m a bit leery because they are not only screwed into the brick, there is also some adhesive or glue behind them that does not look like it would be easy to remove from the brick. I figure we can paint them now, and if we figure out how to remove them later, we can do that.
- Remove the decrepit (and ugly) storm door. Eventually we want to get a replacement (same as I put on the last house), but not sure we want to spend those 300+ beans this summer.
- Paint the front door. I’m a little hesitant here, because it’s a beautiful wood door… but still.
- Plant flowers (water-wise perennials), add mulch & rock to the area between the driveway and the entry sidewalk. We already planted a bunch of bulbs there last fall (hopefully they survived our dry winter!).
- Remove the two shrubs by the front steps. I have two wooden half-barrels that I plan to put there and plant flowers in.
- Get a new mailbox.
- Get new, modern, house numbers.
- Update or replace the outdoor light fixture. We’ll probably want to save up for something we really like, so I may just update the existing one with some brushed nickel spray paint.
- Over-seed the lawn with grass seed, just to make it healthier and thicker.
Here’s my feeble attempt at a sketch using google docs to give a vague idea of what I’m envisioning:

Curb Appeal update?
What do you think? Do-able? Any suggestions or ideas?
Grout, grout, let it all out
I don’t know why that Tears for Fears song came to my head… =)
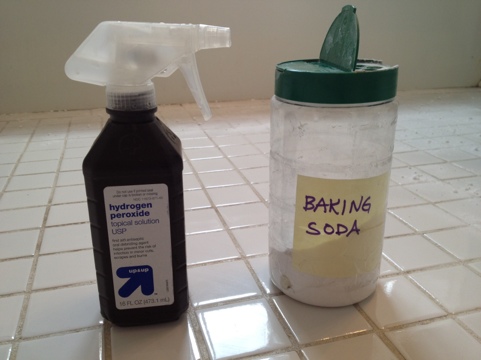
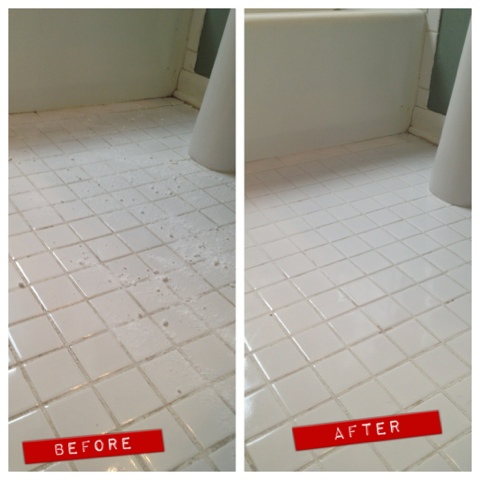
In our wee bathroom, we have wee white tiles on the floor. With supposedly white grout. After I first bought this house, I remember trying to clean the grout with straight bleach and a number of cleaners. All I got was a fumey bathroom. After brainstorming a bit, I decided to try to use baking soda and hydrogen peroxide.
That worked better than any of the cleaners I bought. It’s been almost five years since then, and I’m ashamed to say I haven’t scrubbed the grout since then. So I looked on the web for a green way to clean grout, and low and behold, my baking soda and peroxide was what everyone recommended!
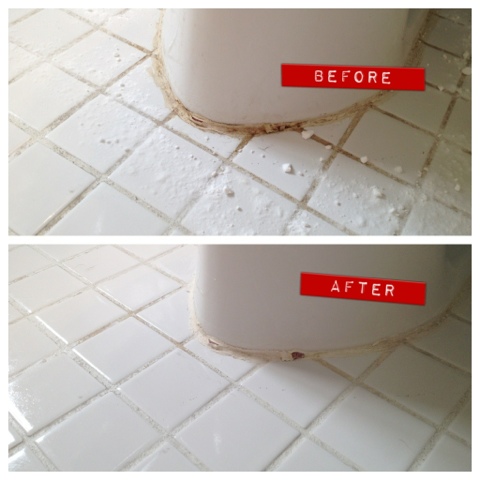
I started by spraying hydrogen peroxide on the floor (I just happened to have a spray top that was the same size as the bottle), and then sprinkling baking soda on top (I found the idea of re-using a parmesan cheese container for baking soda on pinterest). I ended up spraying more peroxide on top of that and letting it sit for a few minutes. The result was a paste. 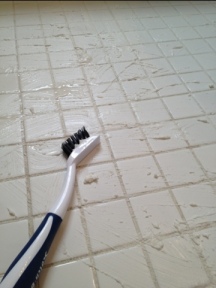 Then I scrubbed with a grout brush, which I frequently dipped into more peroxide. Last time I had used a stiff-bristle brush that was about the size of my hand, but it made a huge mess — spraying my cleaner all over the place… so I got a grout brush thinking that it would contain the mess. I was wrong. It just made the process more tedious and it still made a mess. But, my grout is looking a lot better! Now I’m wincing while I share with you how dirty my grout really was. Ewwww!
If you want to try this technique on your tile grout, just be forewarned that the clean-up is messy. If you use a stiff brush to clean the grout, the paste will spray and will fly up and stick to the walls, bathtub, toilet, etc. So you have to wipe down the walls a bit, and then wipe up the floor. I suppose if you had time to completely let it dry, it might be pretty easy to just sweep or vacuum up before you wipe it down. I’ve also heard that you can incorporate either lemon juice or vinegar into cleaning grout. Does anyone have experience doing that?
Now, I wonder if there are any natural ways to seal the grout to keep it looking clean…?
Every nook and cranny
We have a lot of plants in our wee house. Twenty-one, in fact, now that I think about it. I don’t know where we’d put any more, to be truthful. I was pleasantly surprised when my husband moved in that he brought some plants with him. We both think they really improve the aesthetic of a place, just making it seem more homey. It makes me happy when my plants look happy.

When we committed to getting a new energy-efficient washer and dryer before the baby was born, we also abandoned any hope of the new machines fitting in the teensy little closet where our old stackable unit was. The old unit was perhaps the smallest washer/dryer ever. We could wash two towels at once in the washer, which was approximately the size of a bucket. BUT, it did fit in the closet. Behind a door, even!
When we installed the new machines, they stuck out of the closet. A LOT. (P.S. I forgot to mention that the closet is in our kitchen!) So when I saw a happy little plant hanging on the wall in an ikea container on Pinterest, I thought, “Maybe that would ‘soften’ the edges of the machine a bit…” A little washer/dryer camouflage, if you will. Plus, we could squeeze a few more plants into a new nook/cranny in our house.
We got these containers at IKEA and hung them with some 3M/Command hooks. I will admit that since we took this picture, the bottom container plummeted to its death since apparently the dryer gets really hot on the bottom and the adhesive hook just wouldn’t stay put. I was able to save most of the plant, though; it has a new home in an old candle jar in the nursery (repurpose, repurpose, repurpose!).
The other major bonus about house plants is that they naturally clean your air. And our planet can use all the help it can get, right?
So what do you think, is the dryer sufficiently camouflaged? 😉
A Green Rainbow
Happy belated Earth Day!
We decided before Norah born that we wanted to use cloth diapers. Not only would it save thousands of diapers from ending up in our local landfill, it would save us thousands of dollars too (especially if we have more than one kiddo)! Though there is a larger financial investment upfront (the kinds we got were around $18 each), after that it’s simply the cost of doing laundry.
We ended up buying 25 total diapers — about half are Bum Genius 4.0‘s, and the other half are Fuzzibunz. We chose to get the kind with snaps, because I read they would last longer than velcro. Despite having enough diapers to last us through a couple of days, we usually do a load of diaper laundry every day. We don’t like to run out of clean diaps, even though we do have a small emergency back-up pack of disposables.
We started using them when Norah outgrew the newborn-sized disposable diapers. We didn’t want to invest in newborn cloth diapers (it seems silly since they can only fit into them for a few weeks, plus newborns go through so many diapers each day!). I think we switched when she was 5 or 6 weeks old.
So far, we love cloth diapering! They’re adorable and they don’t seem to leak any more than the disposables did. We were also lucky enough to find a daycare provider that allows cloth diapers!

P.S. I wrote this whole blog entry on my iPhone, trying out the WordPress app. My only complaint is that I couldn’t put the photo where I wanted. =)
Dresser dress-up
Probably the easiest way to “live green” is to re-use things you already own for other purposes. Matt and I have tried to do that from time to time — for example, we re-used the folding side table leaves from a small bistro table to make floating shelves. Just a quick sanding, staining, and using some floating shelf brackets from Home Depot later, here’s a before and after:


But since we live in such a small home (733 square feet), our ability to hold on to things (“just in case”) is limited. So we often have to craigslist items that we no longer use. However, craigslist has also been great for finding used pieces to renovate. When we started to put together our nursery, we decided to get a dresser to use for both storage and a changing table. After stalking craigslist for a solid-wood piece for a while, we found one with a good amount of character for $40. We hoped to stain it, but upon closer inspection, we realized we had purchased a dresser (well, a buffet, really) that was solid wood with a wood veneer. Booo! (Note to Self: always do the close inspection BEFORE buying!) So instead of staining, we decided to paint. I had found some fun dressers on Pinterest that had different colored drawers, so that’s what we went with. So here’s the before and after on the dresser:

My apologies for crappy photos. I promise I’ll get better.
About

Hi, I am a 30-something working mom in Colorado. We are into green living, the outdoors, travel, adventures in parenting, and DIY home improvements.
I started this blog when we lived in a 733-square-foot home, hence the name. Since then, we have moved to a 1950s fixer-upper ranch that is around 2,000 square feet.
-
Archives
- August 2014 (1)
- December 2013 (1)
- October 2013 (2)
- September 2013 (2)
- August 2013 (5)
- May 2013 (2)
- April 2013 (2)
- March 2013 (3)
- February 2013 (1)
- October 2012 (1)
- September 2012 (1)
- July 2012 (2)
-
Categories
-
RSS
Entries RSS
Comments RSS
